Showing posts with label Bake Exchanges/Sales. Show all posts

Saturday, January 20, 2024

Spritz Cookies (Cookie Press)

                                                          SPRITZ COOKIES


This cookie is one of my hubby's favorites, and since he could actually enjoy them this year, I made them as a special treat. I have always found them extremely fussy and guess what? I discovered that the difference is in the dough! Sheesh! Who would have guessed it! So here is a great "found" recipe with perhaps a tweak or two to make them even better.

Note: The recipe makes a LOT of dough - it pretty much filled the bowl of my stand mixer (my new toy). So, you can either go on "Cookie Palooza" and git going, using different sprinkles, cherries, tiny gumdrops or chocolate chips and so on for the center. The main thing is not to fret! Even if the cookies aren't perfect, they are the closest I have found to what I would deem a very light shortbread (my favorite) and a good, solid spritz dough. Enjoy, and if you prefer, you can freeze some of the dough for up to 3 months, wrapped in plastic wrap and place in a zipped plastic bag. The entire batch will take at least 3 cookie sheets, depending upon how large you "spritz your cookies." I do love my vintage cookie maker!


PUTTING ON THE SPRITZ


Ingredients:

  • 1 c unsalted butter, softened to room temperature
  • 3/4 c granulated sugar
  • 1 large egg, room temperature
  • 1 tsp pure vanilla extra (I used this for the first time and it makes a difference)
  • 1 tsp almond extract (we don't care for almonds, so I doubled the vanilla)
  • 1/2 to 1 tsp cinnamon
  • 2 1/3 c all-purpose flour, spooned and leveled
  • 1/2 tsp salt
The fun stuff: gel food coloring, sprinkles, chocolate chips, melted chocolates, halved maraschino cherries, etc. Let your imagination fly! If you want to use gel food coloring you only need a bit to color cookies before baking, since you want to keep them pastel. 

Instructions:
  1. Preheat oven to 350 degrees (177 C)
  2. Line 2 or 3 large baking sheets with silicone baking mats or use nonstick bakeware with no liner. (HINT: I have discovered that pressed cookies do not adhere to parchment paper BUT you can use aluminum foil with the dull side up as long as you watch that the bottoms don't brown too much. Do not use nonstick foil! This may mean slightly reducing baking time. If you can chill the prepared baking sheets, that works even better.)
  3. Making the dough: In the large bowl that comes with your stand mixer (or your own bowl using a handheld mixer) fitted with a paddle attachment, beat the butter and granulated sugar together on MEDIUM-HIGH for approximately 2 minutes. Add the egg, vanilla and almond extract (if desired). Beat on HIGH for about 1 minute. Scrape sides and the bowl bottom, beating again for an additional minute to combine. On LOW, beat in flour, cinnamon and salt. Turn to HIGH and beat until completely combined. It will start forming a ball. You can add gel food coloring at this point if you like.
  4. Pressing the dough: Fit the cookie press with your first decorative plate. It's fun to use variety, especially if you have children helping you. Hold the cookie press perpendicular to your pan (one edge touching and the press at an angle to help the dough stick), press out the cookies approximately 2 inches apart. Don't make too huge or press too hard or they may become distorted and won't be as pretty. If using sprinkles, brush the formed cookies lightly with water to help them stick before sprinkling and placing in the oven. If you find the dough is getting too soft, simply refrigerate between pressing, while the first cookie sheet is in the oven. 
  5. Baking: Bake for approximately 7-9 minutes. You want the bottoms just golden, not dark. Using foil as a liner on pans may take just 5 minutes per pan, depending upon your oven. I have a gas range that runs hotter, so I have to be really careful. Allow about 5 minutes before removing from pans to cool completely. I just put them on my counter on a clean tea towel, but some prefer using a rack. This is the time to drizzle on melted chocolate if you like.
Hints: 
  • Dough may be made beforehand and chilled in the fridge until you are ready to make your cookies. If you freeze the dough, take it out and let it thaw to room temperature before using the press. 
  • If you don't have a cookie press, you can use a pastry bag with a star tip or other decorative cookie tip.  But since my vintage press is my choice, it comes out every Christmas. We found it years ago at the thrift store.


Monday, July 15, 2013

Double Chocolate S'mores Brownies

Double Chocolate S'mores Brownies


These delicious brownies were created using ideas from several different recipes. When I accidentally used sweetened condensed instead of evaporated milk, I  had to made some adaptations to make the recipe 'work.' Hey, it happens to the best of us! :) The result was ooey gooey, caramel-y brownie perfection. Kept at room temperature, they will last for 4 to 5 days in a cool place. I like to store mine in a covered plastic ice cream pail with waxed paper between the layers. Why the "S'mores" name? Because of the combination of graham wafers, chocolate and mini marshmallows, of course!

Ingredients

Brownies
  • 1 box of Betty Crocker Super Moist Chocolate Cake Mix
  • 3/4 c melted margarine
  • 2/3 + 2/3 can sweetened condensed milk 
  • 1/2 c low-fat milk
  • 1/2 + 1/2 pkg dark chocolate chunks (divide pkg in half for 2 different steps)
  • 1/3 pkg semi-sweet chocolate chips
  • 1/2 pkg mini marshmallows
Topping
  • 1 1/2 c crushed graham crackers or graham cracker crumbs
  • 1/4 c butter or margarine
  • 1/4 c sugar
Directions
  1. Mix the dry cake mix, 2/3 c sweetened  condensed milk and 3/4 c melted margarine and spread in greased 9x13 pan. Bake at 350 degrees for 6 minutes. 
  2. Take out of oven and sprinkle with chocolate chips and mini marshmallows. Put back in oven for approximately 5 minutes, until marshmallows and chocolate chips soften. 
3. In microwave, heat the chocolate chunks and the rest of the sweetened condensed milk for approximately 1 1/2-2 minutes. Stir, adding 1/2 c low-fat milk to smooth, reheating for 30 seconds to soften if necessary.
4. Combine graham wafer topping ingredients and sprinkle half of the mixture over the marshmallows and chocolate chips. 5. Pour the heated chocolate mixture over the wafer topping, then sprinkle the remaining crumbs evenly over  everything.
6. Bake in oven for about 20 minutes, until a knife inserted into the brownie layer at the bottom comes out  clean and the sides are puffed and dry. There will be some melted chocolate and marshmallows on the  knife. Let cool and cut into 2 inch squares with a knife dipped into hot water.


Tuesday, April 2, 2013

Peanut Butter and Jelly bars

Spring Break's over - at least here in Nevada - but it doesn't stop the kids' cravings for good stuff to eat. Then again, maybe we should say all kids large and small! Here is a great recipe found by browsing (I sure do love the internet sometimes):


PBJ Bars - Totally Yum!
Peanut Butter and Jelly Bars
  • Ingredients
1 white cake mix
2 eggs
1/3 cup canola oil
1/2 cup crunchy peanut butter (or creamy)
1/2 cup grape jelly (or other flavor)
1 cup peanut butter chips
Instructions
  1. Preheat oven to 350°F.
  2. Mix together cake mix, eggs, oil and peanut butter.
  3. Set aside 1/2 cup of the mixture.
  4. Press remaining mixture into a parchment lined, greased 8x8" square pan.
  5. Spread jelly over the crust in pan.
  6. Mix the 1/2 cup of cookie mixture with the peanut butter chips until large crumbles appear.
  7. Sprinkle the crumbles evenly over the crust in the pan.
  8. Bake at 350°F for 20-25 minutes.

Monday, November 12, 2012

Veldt Bread (Namibia)

When we went to Disney World, I found the recipes at Animal Kingdom Lodge delicious and totally fascinating. This little journey into "The World" piqued my interest and kept me looking for other recipes from Africa, whether inspired by India or Europe. Hence this Veldt (or Wild) Bread. Simple, spicy and different from the norm, it would be great to serve at a wine and cheese party, or with dips of all kinds at your next gathering, along with Naan and other African breads. <From cdkitchen.com> The early European pioneers (Boers) were ill-equipped to produce the conventional breads of their homeland, and so developed this spicy substitute which has become a national specialty. This recipe produces a loaf of about 900 grams (almost 2 pounds). 
Note: I used the converter tool on my computer to adapt the recipe to Western amounts. Simply type "convert (grams to cups or mL to tsp)" or whichever you would like 'translated' to an amount you can understand. Being Canadian, I have no problem with metrics but even I got confused without the converter. Because of the conversion, you may have to add a wee bit more flour or milk to get the right consistency.
Veldt Bread
A change from the norm - a bit drier, a bit denser but delicious

INGREDIENTS:

  • 50 grams margarine (scant 1/4 c)
  • 450 grams whole-meal flour (approx. 2 c)
  • 20 milliliters baking powder (4 tsp)
  • 50 grams brown sugar (scant 1/4 c)
  • 1/2 teaspoon salt
  • 1/2 teaspoon ground cinnamon
  • 1/4 teaspoon ground cloves
  • 1/4 teaspoon allspice
  • 150 milliliters skimmed milk (1/2 c plus 1/8 c)
  • 1 egg, beaten
  • 1 teaspoon vegetable oil

DIRECTIONS:


Sift flour, baking powder and salt in a bowl. Mix in the sugar and spices, then add the margarine. Rub the margarine into the mix until it is crumbly. Form a well in the middle and pour in the milk and egg. Mix together into a stiff dough, and put on a floured board. Knead dough for 10 minutes until smooth. Grease the inside of a 900 g (preferably pyrex) loaf tin with the oil (cooking spray will help release the bread afterward). Cook for approximately 40 minutes in a 400 F oven. The cooked loaf should sound hollow when tapped. If not, bake 10 more minutes, then turn onto a rack to cool. Excellent with butter and honey.

Saturday, October 13, 2012

Strawberry Banana White Chocolate Chip Loaf

 Strawberry Banana White Chocolate Chip Loaf
That's quite a mouthful for a loaf, but as delicious as this creation of mine is, it's well worth the effort! Here you get the scrumptious blending of fresh strawberries with bananas and white chocolate chips. Are you drooling yet? I am. A fresh take on an old favorite - banana bread. I wanted one to eat (of course) and what to freeze (what restraint) so I used a smaller aluminum foil loaf pan and a smaller round bundt-type pan that I happened to have lying around. I placed both on a cookie sheet to bake and they turned out beautifully. I love it when that happens!

Ingredients

  • 2 cups all-purpose flour
  • 3/4 teaspoon baking soda

  • 1/2 teaspoon salt

  • 1 cup granulated white sugar

  • 4 tablespoons (1/2 stick) unsalted butter, at room temperature

  • 2 large eggs

  • 3 mashed bananas
  • 1/3 cup mixed berry or plain low fat yogurt

  • 1 teaspoon rum extract
  • 1 cup white chocolate chips
  • 1 cup chopped fresh strawberries, tossed in 2 tablespoon all-purpose flour

Directions
  1. Preheat oven to 350°F. Spray a 9x5-inch loaf pan (preferably Pyrex) with cooking spray.
  2. In a medium bowl, whisk together the flour, baking soda and salt.
  3. In a separate large bowl, beat the sugar and butter with an electric mixer at medium speed until well blended (about 1 minute). Add the eggs one at a time, beating well after each addition. Add the banana, yogurt, and rum extract; beat until blended. Stir in the flour mixture; just until moist. Don't over-mix. Stir in the white chocolate chips and then gently stir in the strawberries. 
  4. Spoon the batter into the prepared pan. Bake for 50 to 60 minutes or until a wooden pick (or knife) inserted in center comes out clean. Cool 15 minutes in the pan on a wire rack. Carefully run a knife around the inside edges to loosen, remove from pan and cool completely on a parchment paper-covered wire rack.
One wasn't enough. I made one in a 4c bundt pan and one in a small loaf pan

Note: To make it easier to remove the loaf without cracking, you can place parchment or wax paper in the loaf pan, overlapping the edges to use as a "handle." Spray with cooking spray before pouring the ingredients in. Then you can just lift it out when it's baked. The pans were flimsy, so I placed them on a cookie sheet, 10 minutes on a lower rack in the oven and then 20 minutes or so on the middle rack to cook evenly without burning.

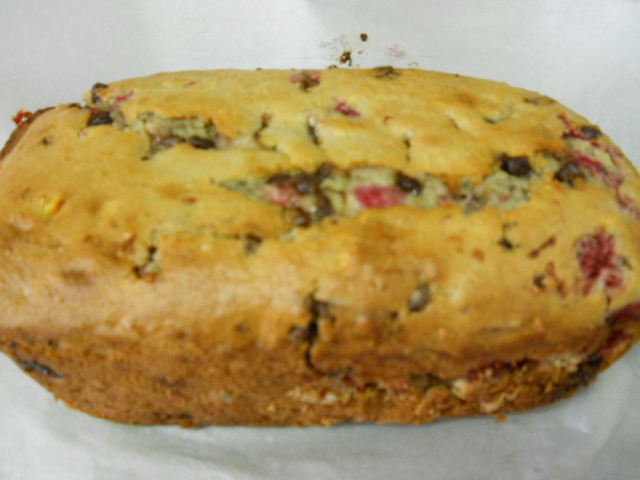
Raspberry Banana Milk Chocolate Loaf


Raspberry Banana Chocolate Loaf

Yield: 1 loaf
Prep Time: 15 min
Cook Time: 50 min
A combination I couldn't even imagine until I created it. Sometimes you just have to use what you have on hand and go for it with gusto! Just how much goodness can one loaf hold? Try it out and see for yourself!
Raspberry Banana Milk Chocolate Loaf

Ingredients
  • 2 cups all-purpose flour
  • 3/4 teaspoon baking soda

  • 1/2 teaspoon salt

  • 1 cup granulated white sugar

  • 4 tablespoons (1/2 stick) unsalted butter, at room temperature

  • 2 large eggs

  • 3 mashed bananas
  • 1/3 cup mixed berry or plain low fat yogurt

  • 1 teaspoon rum extract
  • 1 cup milk, dark or semi-sweet chocolate chunks or chips (I used milk chocolate)
  • 1 cup halved fresh raspberries, tossed in 2 tablespoon all-purpose flour
Fold, don't stir and make sure the raspberries have been dredged in flour before adding
Directions
  1. Preheat oven to 350°F. Spray a 9x5-inch loaf pan (preferably pyrex) with cooking spray.
  2. In a medium bowl, whisk together the flour, baking soda and salt.
  3. In a separate large bowl, beat the sugar and butter with an electric mixer at medium speed until well blended (about 1 minute). Add the eggs one at a time, beating well after each addition. Add the banana, yogurt, and rum extract; beat until blended. Stir in the flour mixture; just until moist. Don't over-mix. Stir in the chocolate chunks and then gently stir in the raspberries. If you want, you can sprinkle a few additional chocolate chips and raspberries on the top.
  4. Spoon the batter into the prepared pan. Bake for 50 to 60 minutes or until a wooden pick (or knife) inserted in center comes out clean. Cool 15 minutes in the pan on a wire rack. Carefully run a knife around the inside edges to loosen, remove from pan and cool completely on a parchment paper-covered wire rack.
Note: To make it easier to remove the loaf without cracking, you can place parchment or wax paper in the loaf pan, overlapping the edges to use as a "handle." Spray with cooking spray before pouring the ingredients in. Then you can just lift it out when it's baked.

Sunday, April 29, 2012

Strawberry Cheesecake Tartlets

Strawberry Cheesecake Tartlets
Our friends at BHG have a sweet little tartlet just right for Mom on Mother's Day. This delicious treat was originally slated for Christmas, but there's no reason why Mom doesn't deserve a bite-sized bit of cheesecake any time of year.
From Better Homes & Gardens
Ingredients
  • cup all-purpose flour
  • 1/4 cup sugar
  • 1/4 cup ground toasted almonds
  • 1/4 cup butter
  • egg yolk, lightly beaten
  • 2 - 3 tablespoons water
  • 4-serving-size package cheesecake instant pudding and pie filling mix
  • cup evaporated milk 
  • 2 teaspoons vanilla
  • 1/2 teaspoon almond extract
  • 1/3 cup strawberry preserves
  • Sliced strawberries and/or toasted sliced almonds 

Directions              

  1.               In a medium bowl, stir together flour, sugar, and ground almonds. Using a pastry blender, cut in butter until pieces are pea-size. In a small bowl, combine egg yolk and 2 tablespoons of the water. Gradually stir the egg mixture into the flour mixture until combined. If necessary, add enough of the additional water to make a dough that starts to cling. Gently knead just until smooth; form dough into a ball. If necessary, cover and chill about 1 hour or until dough is easy to handle.
  2. Preheat oven to 350 degrees F. Divide dough into 24 pieces. Shape pieces into balls. Press dough evenly into the bottoms and up the sides of 24 un-greased 1 3/4-inch muffin cups. Bake in the preheated oven about 15 minutes or until lightly browned. Cool completely in pan on a wire rack.
  3. For filling: In a medium bowl, combine pudding mix, evaporated milk, vanilla, and almond extract. Beat with an electric mixer on medium speed about 2 minutes or until smooth
  4.               Spoon 2 teaspoons of the filling into each cookie. Cover and chill for 2 to 24 hours.
  5. Before serving, top each cookie with about 1/2 teaspoon of the preserves and a strawberry slice and/or a few sliced almonds. Makes 24 cookies.
Hint from the BHG test kitchen


Storage: To Store, layer filled cookies between waxed paper in an airtight container; cover. Store in the refrigerator for up to 3 days or freeze for up to 1 month. To serve, thaw cookies if frozen. Top with preserves and, if desired, decorate as directed in step 5.

Saturday, April 14, 2012

A Little Slice of Heaven (aka The Pink Slice)

A Little Slice of Heaven (aka The Pink Slice)

Here's a light and unusual slice that has it all: peanut butter, coconut, peanut butter and even my favorite fruity little marshmallows! All covered with a yummy butter cream icing. How can you go wrong? Although the creator calls it "The Pink Slice," I prefer to think of it as "A Little Slice of Heaven." Be prepared: you may want to make a little extra frosting...


Ingredients

  • 1/2 c butter or margarine
  • 1 pkg butterscotch chips
  • 1 c finely grated coconut
  • 1 c peanut butter
  • 1 pkg multicolored marshmallows
Icing
  • 2 c powdered sugar
  • 1 Tbsp butter or margarine
  • 3 drops red food coloring or a little squeeze of gel coloring
  • milk, enough to make a soft consistency of icing
Directions
  1. Melt and cool slightly the 1/2 c of butter and package of butterscotch chips
  2. Add coconut, peanut butter and marshmallows. Mix well.
  3. Press into a greased 9x9 pan.
  4. Icing: Mix powdered sugar and remaining butter. Add milk until desired consistency. Add red food coloring to make a pretty pink. Spread over squares before chilling. Freezes well.


Monday, February 20, 2012

Rum Cake

This recipe is deliciously decadent. I happen to really like rum, so this was the perfect recipe for my collection. Give it a try and see what you think?

Rum Cake


Ingredients

  • 1 box yellow cake mix
  • 4 eggs 
  • 1/2 c oil
  • 1/2 c water
  • 1/2 c finely chopped walnuts or pecans
Mix together all ingredients. Spray a Bundt pan with cooking spray, then sprinkle chopped nuts over the bottom. Pour in cake batter and bake for 325 degrees for 40-50 minutes (check with knife at minimum time).

Rum Glaze
  • 1 stick margarine
  • 1 c sugar
  • 1/4 c water
Combine ingredients in a sauce pan and bring to boil. When it begins to boil, remove from heat and add 1/8 c rum. Pour glaze over the cake.

Wednesday, November 30, 2011

Classic Pinwheel Cookies - Raspberry or Chocolate

Pinwheel cookies have always been one of my favorite Christmas Cookies. They are attractive, colorful and I love the flavor. I recently found a recipe in one of my old cookbooks that is the best I have found, and branched out into making raspberry pinwheels for the first time! I may never go back to just chocolate again, although I will always make those, too. The chocolate one is much easier than the recipe I used to use, where you placed chocolate dough on top of a portion of plain dough to roll together to make the pinwheel design.

With this recipe, after you divide the dough into 4 parts, you use 2 portions to make the raspberry and 2 portions for the chocolate. A bit of variety and color on your cookie plate or for your bake exchange or sale. Plus you have the advantage of the refrigerated dough, where you can make them, chill them, and bake them when you have the time.

Pinwheel Cookies
Raspberry Pinwheel Cookies

INGREDIENTS:
COOKIE DOUGH
  • 1 c butter or margarine, softened
  • 1 c brown sugar (packed)
  • 1 c granulated sugar
  • 2 eggs
  • 2 tbsp vanilla
  • 3 ½ c all-purpose flour
  • 1 tsp baking soda
  • ½ tsp salt
 Directions
  1.  Cream butter with the 2 sugars in a mixing bowl. Beat in eggs, one at a time. Add vanilla.
  2. Stir in flour, baking soda and salt. Divide dough into 4 parts. Roll each part ¼ inch thick into a  rectangular shape
  3. Spread with your choice of fillings, roll up (like a jellyroll) and chill overnight, wrapped in waxed paper or cling wrap.
  4. When ready, unwrap and slice ¼ inch thick and placed on greased cookie sheets.
  5. Bake at 375 degrees for about 8-10 minutes, until the bottoms are slightly golden and the cookies are “set.” Makes about 8 dozen.

FILLINGS

For Chocolate: (a nut-free recipe)

Spread ½ of the dough with 1 c MELTED semi-sweet or dark (I used dark) chocolate chips. Roll, wrap and chill. Let warm at room temperature slightly before slicing or chocolate may be too hard. Bake as directed.

For Raspberry: (has nuts in it)

Spread 1/2 of the dough with a mixture of 1 c raspberry jam, 1 c shredded coconut and ½ c finely chopped nuts. I used chopped hazelnuts but walnuts or pecans would be delicious, too. If you find the mixture too thick to spread, add a little additional jam until you can easily spread it on the dough.Roll, wrap and chill. Cut and bake as directed in recipe. 

Chocolate Pinwheel Cookies

Saturday, November 19, 2011

7-Layer Cookie Bars with a Shortbread Base

I made these this morning and they are so delicious (don't even ask me how I know). I got the original recipe from my mom-in-law (thanks, Jackie!) but have designed a major tweak to make them special. They are part bar, part cookie and part soft delicious goodness. Whether you class them as bar or cookie, they are going to be one of my cookie exchange items at work. These actually IMPROVE after freezing because of the shortbread base, and it's this unique base that gives these cookies their particularly excellent flavor and texture! I will take you step by step, because they are a bit fussy. Please remember to use a nonstick 9x13 pan, edged cookie sheet or the equivalent AND parchment or waxed paper on your pan to prevent sticking. I only had aluminum foil in the house and it was a bit of a struggle getting the edge pieces up.


7 Layer Cookie Bars <stock photo>
Shortbread Base
Ingredients
  • 2 c all-purpose white flour
  • 3/4 c golden brown sugar
  • 2 sticks (1 c) butter, softened
Mix the three ingredients together, using your hands at the end to judge if the dough will stick together. Add a bit more flour if necessary (I added an additional half cup). You want a dough that is soft enough to spread, but not sticky or cracked. In a prepared 9x13 pan or medium cookie sheet with edges (lined with foil or parchment/waxed paper) gently roll or pat the dough into place, pinching edges to make a bit of a barrier to the ingredients falling off during baking.

The Layers
Ingredients
  • 1/2 package of semi-sweet chocolate chips
  • 1/2 package of butterscotch chips
  • 1/2 package of coconut
  • 3/4 to 1 c raisins
  • 3/4 to 1 c chopped walnuts
  • 1 can sweetened condensed milk
Preheat oven to 350 degrees.In a large ziplock bag, combine all ingredients until mixed [non-traditional, but I like it]. Evenly pour the 5 dry ingredients onto the shortbread base. Partially open the sweetened condensed milk can and drizzle evenly over the dry ingredients. Et voila: your 7 layers!

The Baking
Place in preheated oven and bake for approximately 20 minutes (the shortbread base will be golden  underneath and the topping will have caramelized, due to the sweetened condensed milk). Let cool slightly - perhaps 10 minutes - then cut carefully into small bars or diamonds and cool completely before freezing or enjoying.

To freeze use a flat freezer container with a snug lid, and place inside a large ziplock bag to avoid freezer burn. These keep well for up to 3 months in the freezer - if they last that long!


Saturday, November 12, 2011

Nobody Knows the Truffles I've Seen Chocolate Truffles

Bad joke but it's true. I've been researching truffles and this one sounds pretty fool-proof and rather fun. The original recipe called for a whole bag of Oreo Cookies <Gak!>. To me, that is just a bit sweet with the other ingredients, so I toned it down with a box of chocolate Graham Wafer or plain chocolate wafer cookie crumbs instead. Try whichever you prefer.

Chocolate Truffles
Ingredients

  • 1 pkg (8 oz) Philadelphia Cream Cheese, softened
  • 1 pkg (16.6 ox) OREO Cookies, finely crushed (about 4 1/4 c), divided OR the same amount of Chocolate Graham Wafer Crumbs or plain chocolate wafer cookie crumbs
  • 2 Pkg (8 squares each) BAKER's Semi-Sweet Chocolate, melted  
  • NOTE: if desired: cocoa powder, chocolate shot (cake decorations) or sprinkles
Directions
  1. Mix cream cheese and 3 c cookie crumbs (or alternate choice) until well blended.
  2. Shape into 48 (1 inch) balls. Dip in melted chocolate. If desired, roll in toppings such as cocoa powder, chocolate shot or colored sprinkles, or simply sprinkle with remaining cookie crumbs.
  3. Refrigerate for 1 hour or until firm. Store in tightly covered container in fridge. 
HINTS
To melt chocolate: place unwapped chocolate squares in microwaveable bowl. Microwave on high for 2 minutes, stir and keep melting at 30 second intervals until completely melted. If using white chocolate, use medium heat and check after 1 1/2 minutes.
To dip truffles: Place several truffles in a bowl of melted chocolate. Use two forks to roll the truffles, letting the excess chocolate drip back into the bowl. The same forks can be used to gently roll the truffles in toppings, if desired, before placing on a saran wrap-, parchment- or wax paper-lined baking sheet; let stand until firm. 

Million Dollar Fudge

Now we get into true chocolate decadence - fudge! I love fudge and so does Mike, so this is an absolute "yes" for Christmas baking. Here's a wonderful recipe that I got from  allrecipes.com a while back. It has "it" all and just a little bit more.

Million Dollar Fudge
Ingredients:

  • 4 1/2 c white sugar
  • 1 pinch salt
  • 2 tbsp butter
  • 1 (12 fl oz) can evaporated milk
  • 2 c chopped nuts (preferably walnuts or pecans)
  • 1 (12 oz) pkg semisweet chocolate chips
  •  12 (1 oz) squares German Sweet chocolate
  • 2 c marshmallow creme
Directions
  1. Butter two 9x9 inch baking pans and set aside
  2. Place chocolate chips, German chocolate, marshmallow creme and nuts into large mixing bowl. Set aside.
  3. In a 4 qt. saucepan, combine sugar, salt, butter and evaporated milk. Stir over low heat until the sugar dissolves. Bring to boil and cook for 6 minutes.
  4. Pour boiling syrup over ingredients in the bowl; beat until all chocolate is melted. Pour into prepared pans. Let stand a few hours to set before cutting.
Note: Great for bake exchanges or to put together with other baking or treats for teachers or friends. Keeps well in a covered tin box lined with wax or parchment paper.

Friday, October 28, 2011

Ooey Gooey Butter Tarts

Forget the pecan tarts or pie, just bring on the butter tarts! Here is a gooey delicious Canadian treat that's been in our family for generations. All it needs is a good pastry crust that flakes when you cut into it, and a delicious blend of ingredients for a gooey filling. Delicious! You'll want to double the recipe.
Note: If you want to use pre-made frozen pastry shells that you can purchase at the grocery store, those work just fine and cut down part of the preparation time.

Canadian Butter Tarts

INGREDIENTS

Pastry
2 cups flour
1 cup shortening
teaspoon salt
1 egg
1 tablespoon vinegar
2 tablespoons cold water

Filling
1 egg
1/2 cup golden brown sugar
1/2 to 3/4 cup corn syrup (depending on your favorite degree of gooieness)
1 tablespoon melted butter
1 teaspoon vanilla
1 cup raisins 
1/2 cup walnuts

PREPARATION:
Pastry
  1. Blend the shortening and the flour with a pastry cutter, or two knives, until you’ve created a uniform mixture that is crumbly and about the size of frozen peas.
  2. In a separate bowl, mix 1 egg, 1 tbsp white vinegar and 2 tbsp cold water. Add to shortening and flour mixture.
  3. Mix all ingredients together, but only until just mixed and no more.

The key to flaky pastry is not to overhandle the dough.
For ease of handling, make a ball of the dough, wrap in cellophane and place in freezer for 10-15 mins or refrigerate for approximately an hour. Roll out dough onto floured surface to thickness of about 1/4 inch (thin enough to handle but not too fragile).
Using either a cookie cutter, large biscuit cutter or jar lid, cut out circles from the dough. Circles should be about twice the size of the cups in your muffin pans. Press dough circles into a muffin pan and crimp on the edges. 

Filling
  1. In another bowl, mix well corn syrup, brown sugar, melted butter and egg. Add vanilla and stir in raisins.
  2. Spoon filling into pastry shell to just below the rim. 
  3. Bake at 400 for about 10 mins until golden brown. You want it bubbling but not burnt

Makes about a dozen tarts.

Tuesday, October 25, 2011

Donna Sunshine's Nieman-Marcus Cookie Recipe

My friend, Donna, has given me a recipe sent to her by one of her friends. Thanks Donna - looks like a good one!


 Nieman-Marcus Cookies [recipe may be halved]
  
Ingredients
  • 2 c butter
  • 2 tsp soda
  • 5c blended oatmeal (blend to a fine powder)
  • 2 c brown sugar
  • 1 8 oz Hershey Bar (grated)
  • 2 tsp baking powder
  • 2 tsp vanilla
  • 4 c flour
  • 2 c sugar
  • 24 oz chocolate chips
  • 1 tsp salt
  • 4 eggs
  • 3 c chopped nuts (your choice)
Cream together the butter and both sugars. Add eggs and vanilla; mix together with flour, oatmeal, salt, baking powder and soda. Add chocolate chips, Hershey Bar and nuts.

Roll into balls and place two inches apart on a cookie sheet. Bake for 10 minutes at 375 degrees. Makes approximately 110 cookies. Enjoy!