Showing posts with label Countdown to Christmas. Show all posts

Saturday, January 20, 2024

CHOCOLATE PEANUT BUTTER MARSHMALLOW SQUARES (aka CONFETTI SQUARES)

 CHOCOLATE PEANUT BUTTER MARSHMALLOW aka CONFETTI SQUARES

True confessions: I didn't take a photo of just my chocolate/marshmallow/peanut butter squares (aka "confetti") so I am sharing a photo of our Christmas Cookie "Tree" display. Lots of goodies on there - some recipes I have previously shared, some yet to come. But anyway, this is our variety, and if you look carefully, on the bottom part of the cookie stand, you can see (left to right), cherry coconut slice, spritz cookies and yes, lurking to the right my ultimate favorite, chocolate confetti. So easy, so much fun to make a SO delicious!

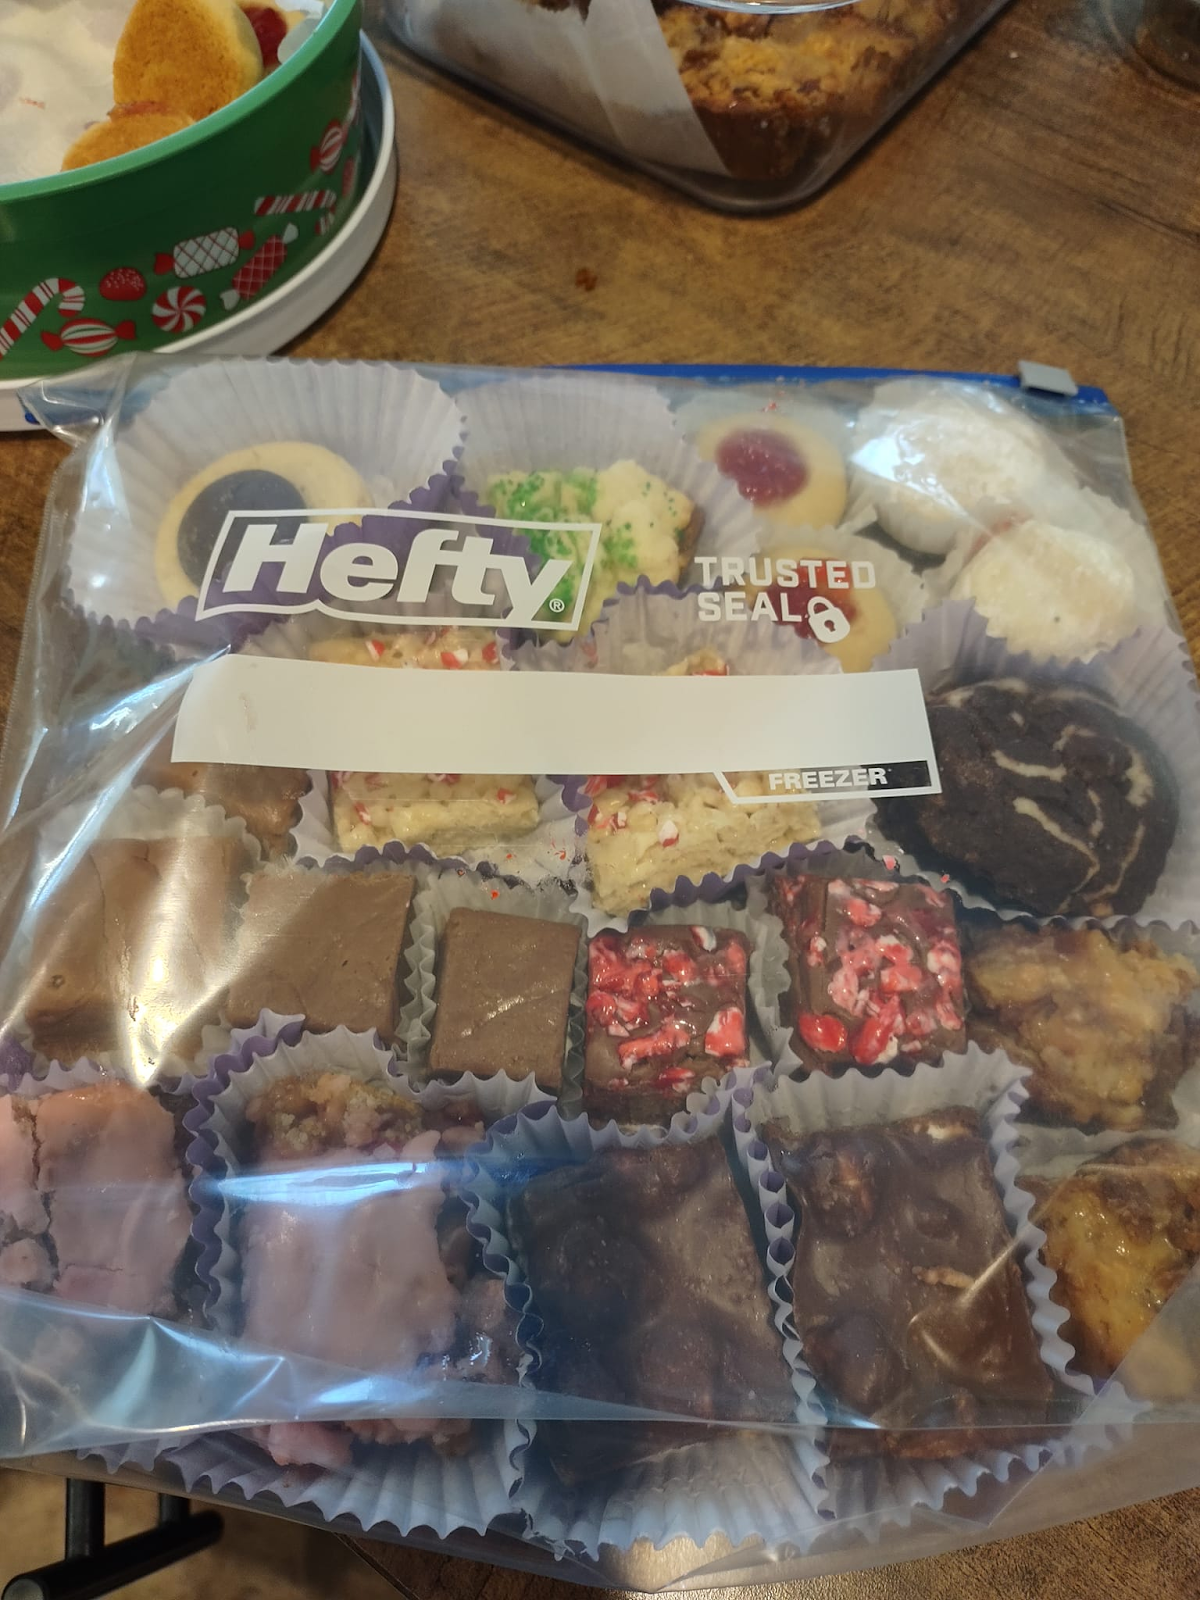

I decided to get smart and make stacking the dang thing a bit easier, so I packaged the variety of baking, tucked into cupcake liners, into freezer bags for easier filling. We do love our cookies! The Chocolate Marshmallow Squares have a prominent place on the bottom right of the bag since I like big chunks of this square - ok I admit it, it is an addiction! But the packed bag is so pretty that I had to share it, too. Just think, all the years I have done Christmas baking and have never thought of this little time and space-saver! Whoah!


So, what is the difference between "Chocolate Confetti" and Chocolate Peanut Butter Square? In my opinion, "Confetti" uses colored mini marshmallows while my square uses white marshmallows. Traditionally, Confetti uses milk chocolate chips while my square - this year - was a mix of half dark and half milk chocolate, which made all the difference. Whichever you prefer, all I know is that I have trouble stopping at one piece, hence only having 2 on the tray at once! Oh, and I prefer making it in a foil pan lined with foil so it's easier to remove and cut without issue. Just a little hint there. This year, I also added about half a cup of marshmallows to the pot while the mixture was still quite warm, so they added a bit of gooeyness, a chewier texture that we liked.


INGREDIENTS:

  • 1/4 c unsalted butter
  • 1/2 c cup creamy peanut butter
  • 3/4 c semi-sweet chocolate chips
  • 3/4 c dark chocolate chips (or use all milk or semi-sweet if you prefer)
  • 5 c white mini marshmallows (rainbow marshmallows for Confetti slice)
DIRECTIONS:
  1. Line an 8x8 or 9x9 foil pan (or baking pan) with aluminum foil. 
  2. In a medium saucepan, over low heat, combine butter, peanut butter and chocolate chips. Melt, stirring until smooth and completely combined.
  3. Remove from heat and stir in 1/c marshmallows - just for the square, not the Confetti.
  4. Let cool slightly and then mix in the remainder of the marshmallows.
  5. Spread in prepared pan and let set at room temperature. 
Note: The slice can be frozen at this point, but I find it much more attractive if sliced into squares with a sharp knife when set, then stored in the freezer in a freezer bag (as pictured above). Don't forget to save a few slices for the baker and a helper to sample! SOMEONE has to taste-test the goods!


Monday, December 8, 2014

Strawberry Santas

I got the cutest recipe in an email for an almost-healthy Christmas project for kids and kids-at-heart like me. A rep from Driscoll's Berries asked if I would like to post this recipe and would I ever! I hope you and yours have a wonderful Christmas and holiday season. I know I have the 'buns in the oven' - well, the dough is rising for cinni buns, mini walnut sticky rolls, orange buns, apple rolls and my favorite zweiback. You may just call this a creative-in-the-kitchen sort of day, which I love best of all! Consider this to be recipe #1 in this year's Christmas Countdown!

Here is the recipe from Driscoll's for the cutest little Strawberry Santas EVER!


INGREDIENTS

  • 1 cup semi-sweet chocolate chips
  • 1/2 cup finely shredded coconut
  • 12 large, flat chocolate cookies such as Famous Chocolate Wafers
  • 8 ounces cream cheese
  • 1/2 teaspoon vanilla extract
  • 2 1/2 cups confectioners' sugar
  • 12 large Driscoll's Strawberries, hulled
  • 12 small Driscoll's Strawberries, hulled
  • 24 Driscoll's Blueberries
  • 24 mini semi-sweet chocolate chips
  • 24 mini white chocolate chips

DIRECTIONS

  1. Melt semi-sweet chocolate chips in a small, wide, microwave-safe bowl on low setting until smooth. Place coconut in wide, shallow, small bowl. Place cookies in single layer on serving platter.
  2. Combine cream cheese, vanilla and sugar in a medium bowl and mix to create thick frosting (add more sugar as needed if too thin).
  3. Place cream cheese frosting in sturdy, resealable plastic bag and snip one corner off bottom to create disposable decorating bag. Alternatively, use a pastry bag fitted with a large round tip. Refrigerate 10 - 15 minutes or until firm.
  4. One by one, with strawberry tips pointing up and hulled base pointing down, pipe beard shape with cream cheese frosting at center of strawberry. Press strawberry into coconut beard-side down to adhere coconut to beard. Attach hulled end of strawberry to cookie base with a small dollop of melted chocolate.
  5. Dip blueberries half-way into melted chocolate and affix two to each base of berry on cookie to form Santa's boots.
  6. Pipe cream cheese frosting around strawberry tips to create heads. Use white mini chips for noses and semi-sweet mini chips for eyes.

Saturday, September 29, 2012

Countdown to Christmas Recipe 1: Snowman Cupcakes

I am on a quest to find the cutest and most tasty Holiday treats for Christmas and Thanksgiving. Today's sweet Snowman cupcakes comes from allyou.com, and I absolutely love them! 
Snowman Cupcakes from allyou.com


Ingredients:
  • 12 cupcakes, baked in colored foil liners, cooled
  • 1/4 cup each red and green decorating sugar
  • 24 mini vanilla wafers
  • 1 can (16 oz.) vanilla frosting
  • 4 orange fruit slices
  • 1/4 cup dark chocolate frosting
  • 1 cup white decorating sugar
  • 6 each red and green licorice twists
  • 24 pink large sprinkles
  • 24 mini brown M&M’s
Directions:
1. Place the red and green sugars in separate shallow bowls. Spread a thin layer of vanilla frosting on top of the mini vanilla wafers to cover. Press the top of 12 wafers into the red sugar to coat. Repeat with the remaining 12 wafers and press into the green sugar. Set aside.
2. Cut 12 1-inch triangles from the orange slices to make the noses. Spoon the dark chocolate frosting into a freezer-weight ziplock bag. Spoon 1/4 cup of the vanilla frosting into a freezer-weight ziplock bag. Place the white decorating sugar in a shallow bowl. Spread the remaining frosting on top of cupcakes and make a smooth mound. Roll the tops of the frosted cupcakes into the white sugar to cover completely.
3. Add the cut orange candy as the nose in the center of the cupcake. Add the chocolate candies as the eyes. Snip a very small corner from the bag with the chocolate frosting and pipe a mouth. Add the pink sprinkles as cheeks.
4. Cut the licorice twists into 12 6-inch lengths for the bands of the earmuffs. Insert the 2 cut ends into either side of the cupcake for the headband. Snip a small corner from the bag with the vanilla frosting. Pipe a dot of vanilla frosting on either side where the licorice enters the cupcake. Add the like colored vanilla wafers as the muffs. Repeat with the remaining cupcakes.